E-mail: [email protected]
Phone: +86-572-8356001
E-mail: [email protected]
Phone: +86-572-8356001
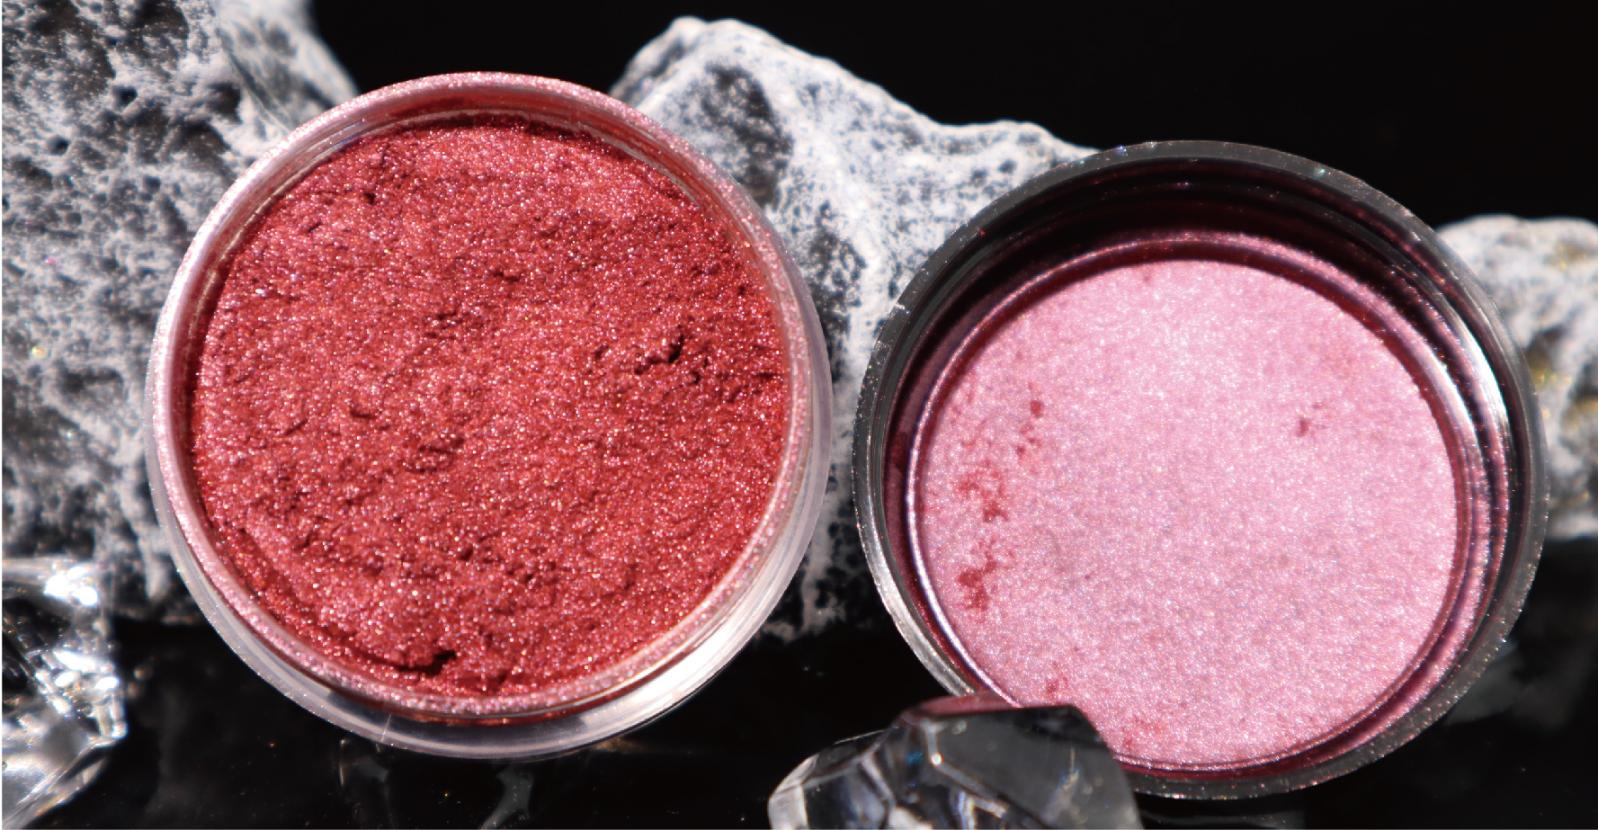
Metallic lustre pearlescent pigments have become a popular choice in various industries, from cosmetics and fashion to automotive finishes and home décor. These pigments are prized for their ability to create shimmering, reflective surfaces that add depth, dimension, and a touch of luxury to any product. However, achieving the perfect pearlescent finish requires more than just choosing the right pigments. It involves understanding how to properly incorporate these materials into your project, how to layer them for maximum effect, and how to adjust the technique for different surfaces.
In this article, we’ll share essential tips and tricks for using metallic lustre pearlescent pigments to achieve flawless, radiant finishes that will wow your audience.
1. Choose the Right Pigment for Your Project
The first step in achieving a perfect pearlescent finish is selecting the right metallic lustre pigment for your project. These pigments come in various colors, particle sizes, and finishes, each providing different effects. Consider the following:
Color: Some pigments have more vibrant hues, while others offer softer, more subtle tones. Choose a color that aligns with your design concept.
Particle Size: Smaller particle sizes create a smoother, more refined finish, while larger particles give a more textured or glittery effect. Consider your desired finish before selecting.
Application Surface: Certain pigments are designed specifically for use in paints, while others work better in cosmetics or textiles. Make sure the pigment you choose is compatible with the medium you’re working with.
2. Mix Pigments Properly
When mixing metallic lustre pearlescent pigments into a medium (e.g., paint, resin, or even body lotions), it’s important to achieve the right consistency. The key is ensuring the pigment disperses evenly throughout the mixture to avoid clumping and uneven color distribution.
Use a Mixing Medium: For paints, clear binders or gloss mediums can help distribute the pigment evenly, allowing for smooth application.
Pigment-to-Medium Ratio: The typical ratio is around 5-10% pigment to medium, but this can vary depending on the desired intensity. Experiment with different ratios to find the effect that works best for you.
Thorough Mixing: Use a mixing tool like a spatula or an electric mixer to blend the pigment and medium thoroughly. The more evenly the pigment is mixed, the more uniform your pearlescent finish will be.
3. Layer for Depth and Shine
One of the most effective ways to enhance the pearlescent effect is by layering the pigment. When applied in multiple thin layers, the pigment can create a rich, deep shimmer that reflects light from different angles.
Thin Coats: Apply multiple thin layers of your pigment mixture rather than one thick coat. Thin layers allow for better control of the final effect and reduce the risk of uneven coverage.
Allow Drying Time: Between each coat, make sure to allow sufficient drying time to prevent smudging or mixing of layers. For best results, follow the manufacturer's recommended drying times.
Alternate Techniques: If you want a more textured look, you can try different application techniques like airbrushing, sponging, or brushing. Each method will create different visual effects.
4. Control the Sheen and Gloss Levels
The intensity of the pearlescent finish can be adjusted by controlling the level of gloss or matte in the final coat. Some surfaces may require a glossy finish to maximize the shine, while others may benefit from a softer matte look.
Gloss Finish: To create a high-shine pearlescent effect, finish with a clear gloss or varnish coat. This enhances the reflective properties of the pigment and provides a smooth, shiny surface.
Matte Finish: For a more subtle shimmer, a matte or satin finish can help diffuse the light, creating a softer, less reflective appearance.
Test the Sheen: Before applying the final coat, test the finish on a small area to make sure it achieves the desired gloss level. You can always adjust by adding more layers of clear coat or matte finish as needed.
5. Apply on the Right Surface
Metallic lustre pearlescent pigments perform best on smooth, prepared surfaces. Proper surface preparation can significantly impact the final outcome of your project.
Smooth Surfaces: Make sure the surface you're working on is clean, dry, and free of any oils or dust. A smooth, well-prepared surface ensures that the pigment adheres evenly.
Priming: For porous surfaces like wood or fabric, applying a primer can help create a more even base for the pigment to adhere to. This is especially important when working with large areas like walls or textiles.
Test Before Full Application: If you’re working on an irregular or textured surface, it’s a good idea to test the application on a small, inconspicuous area first. This ensures the pigment applies smoothly and adheres properly.
6. Experiment with Mixing Other Pigments
If you’re aiming for a unique finish, try experimenting by combining metallic lustre pearlescent pigments with other types of pigments, such as matte, iridescent, or glitter pigments. This allows you to create custom effects that enhance the visual impact.
Iridescent Pigments: These can be mixed with metallic pigments to create a color-shifting effect, adding even more depth and dimension to your design.
Glitters: For a more sparkly, festive finish, you can add fine glitters to the metallic pigment mix. The glitter will catch the light in different ways, making the finish even more dazzling.
Custom Blends: Don’t be afraid to experiment with your pigment combinations! By mixing pigments of different colors and finishes, you can create entirely new hues and effects that stand out.
7. Work in Good Lighting
When applying metallic lustre pearlescent pigments, always work in well-lit conditions. Good lighting helps you see how the pigment is interacting with the surface and will give you a better understanding of how light reflects off the finish.
Natural Light: If possible, work in natural light, as it’s the best way to see the true effect of the pigment.
Angle for Best Results: Try moving your project around and observing it from different angles to see how the light interacts with the pearlescent surface. This will give you a better idea of how the final product will appear.
8. Consider the End Use
Finally, always keep in mind the intended end use of your product. Some projects, like automotive finishes, may require extra durability, while others, like cosmetics or home décor items, may need to be more flexible or skin-safe. Make sure the product you’re using is suitable for its application.
Durability: For products like furniture or cars, you’ll need a more durable finish that can withstand wear and tear. Ensure the paint or resin used is formulated for long-lasting protection.
Safety: In the case of cosmetics or body art, make sure to use pigments that are approved for skin contact and free from harmful chemicals.
Contact Us
Mobile
 English
 Español